I got the subframe mount repair bits in the other day, and welded one in. I took a bunch of pics, to try and detail the process. It's really not too tough, just takes some time.

The first thing to do is line up the repair piece. You want some kind of indicator of position. Here, "top" was plenty, as there wasn't too many other ways this thing could go on there. YOu can just barely see I've traced the piece with a black Sharpie. Could just as easily use soapstone, but Sharpies smell better.

There you can see the tracing. You can see how rusted the mount is from here. Not good. The new mounts will be much stronger, and a much tighter fit.
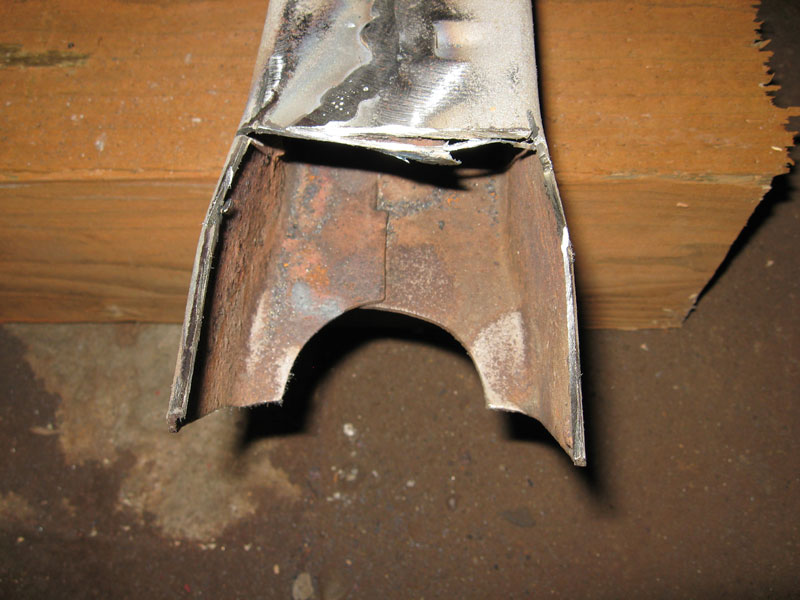
Next, you cut out the old nasty stuff. My cut here isn't too clean on the inside, but I fixed that with a nice flat file I keep around.
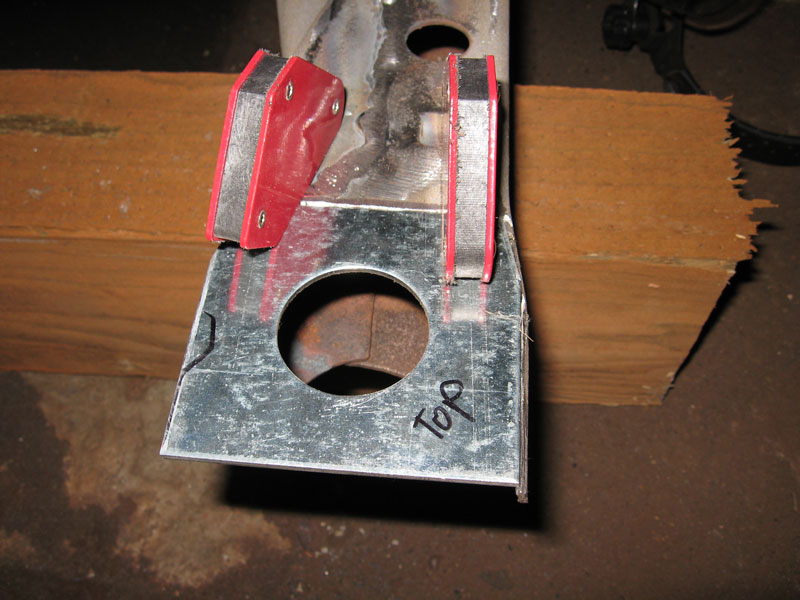
Fitting the piece after you cut takes a little time. You want the repair piece to be completely flush with the frame. The magnets help to hold the piece. They're not very strong, but they do OK. I'll probably pick up some stronger magnets in the future. These are nice because they can hold the metal at several different angles. All you need is enough hold to place your tack welds.

Those be the tack welds. I also tacked it on that other outside corner, to make sure the piece doesn't move as the metal tries to contract/expand as it's welded.

Now, despite myself, I almost got a half decent bead going there on the top. I found that moving faster and watching the puddle helped a great deal. It's important to be comfortable, and not to strain. I have an awful tendency to hold the welding gun with a Death Grip, and that's just not necessary. You want to be nice and relaxed, and let things flow instead of forcing them.
You'll note the white/yellow color on the metal. These repair pieces are galvanized steel. You want to take care with galvanized metal, because as you weld and cut and grind it, it gives off some fairly nasty dust and gas. It's advisable to have a well-ventilated area, regardless of what you're welding. There are always fumes, and if you're welding with inert gas, as I am, that stuff is heavier than air, and will collect around the floor. If you're not careful, you can just kinda asphyxiate yourself and never know it.

See that nasty white stuff? I wish they wouldn't send these out galvanized. I'm going to POR-15 the whole frame, anyway. The black streak is where the weld has penetrated through. I have the welder set at 3 on the power, and between 25/30 on the wire feed. And I have the gas set at just under 20 cubic inches/minute.

After some flap-disk fun and games, the repair ends up looking OK. It feels much stronger than the old one, too.
So that's all there is to welding in a replacement piece in that frame. I'm only going to do the same mount on the other side of the frame. I do have replacement pieces for all of it, but the other subframe mounts are good to go.
No comments:
Post a Comment